It's 8 PM. Frank slumps into the driver's seat of his van, the cab light casting a harsh glare on the day's casualties: a greasy stack of invoices, a coffee-stained notepad of cryptic phone numbers, and a smartphone glowing with missed opportunities. Three missed calls. Five unread texts. Each one a potential job, a leaky faucet of revenue bleeding out of his business while he was busy fixing someone else's.
He listens to a voicemail, his shoulders sinking with every word. "Hi, this is Mrs. Gable. My water heater is making a..." He deletes it. By the time he calls back in the morning, she'll have found a plumber who actually answered the phone. Another text: "Do you guys do trenchless sewer repair?" He does, and it's his most profitable service. But he was under a house when the text came in. That lead is now cold, likely already booked with a competitor who gave an instant response.
Frank is a master of his craft—a brilliant plumber—but a bottleneck in his own company. He's losing thousands of dollars every month, not because of the quality of his work, but because he can't physically be in two places at once. His voicemail is a graveyard where high-value leads go to die. His evenings are a frantic, stressful race to catch up, costing him both money and peace of mind.
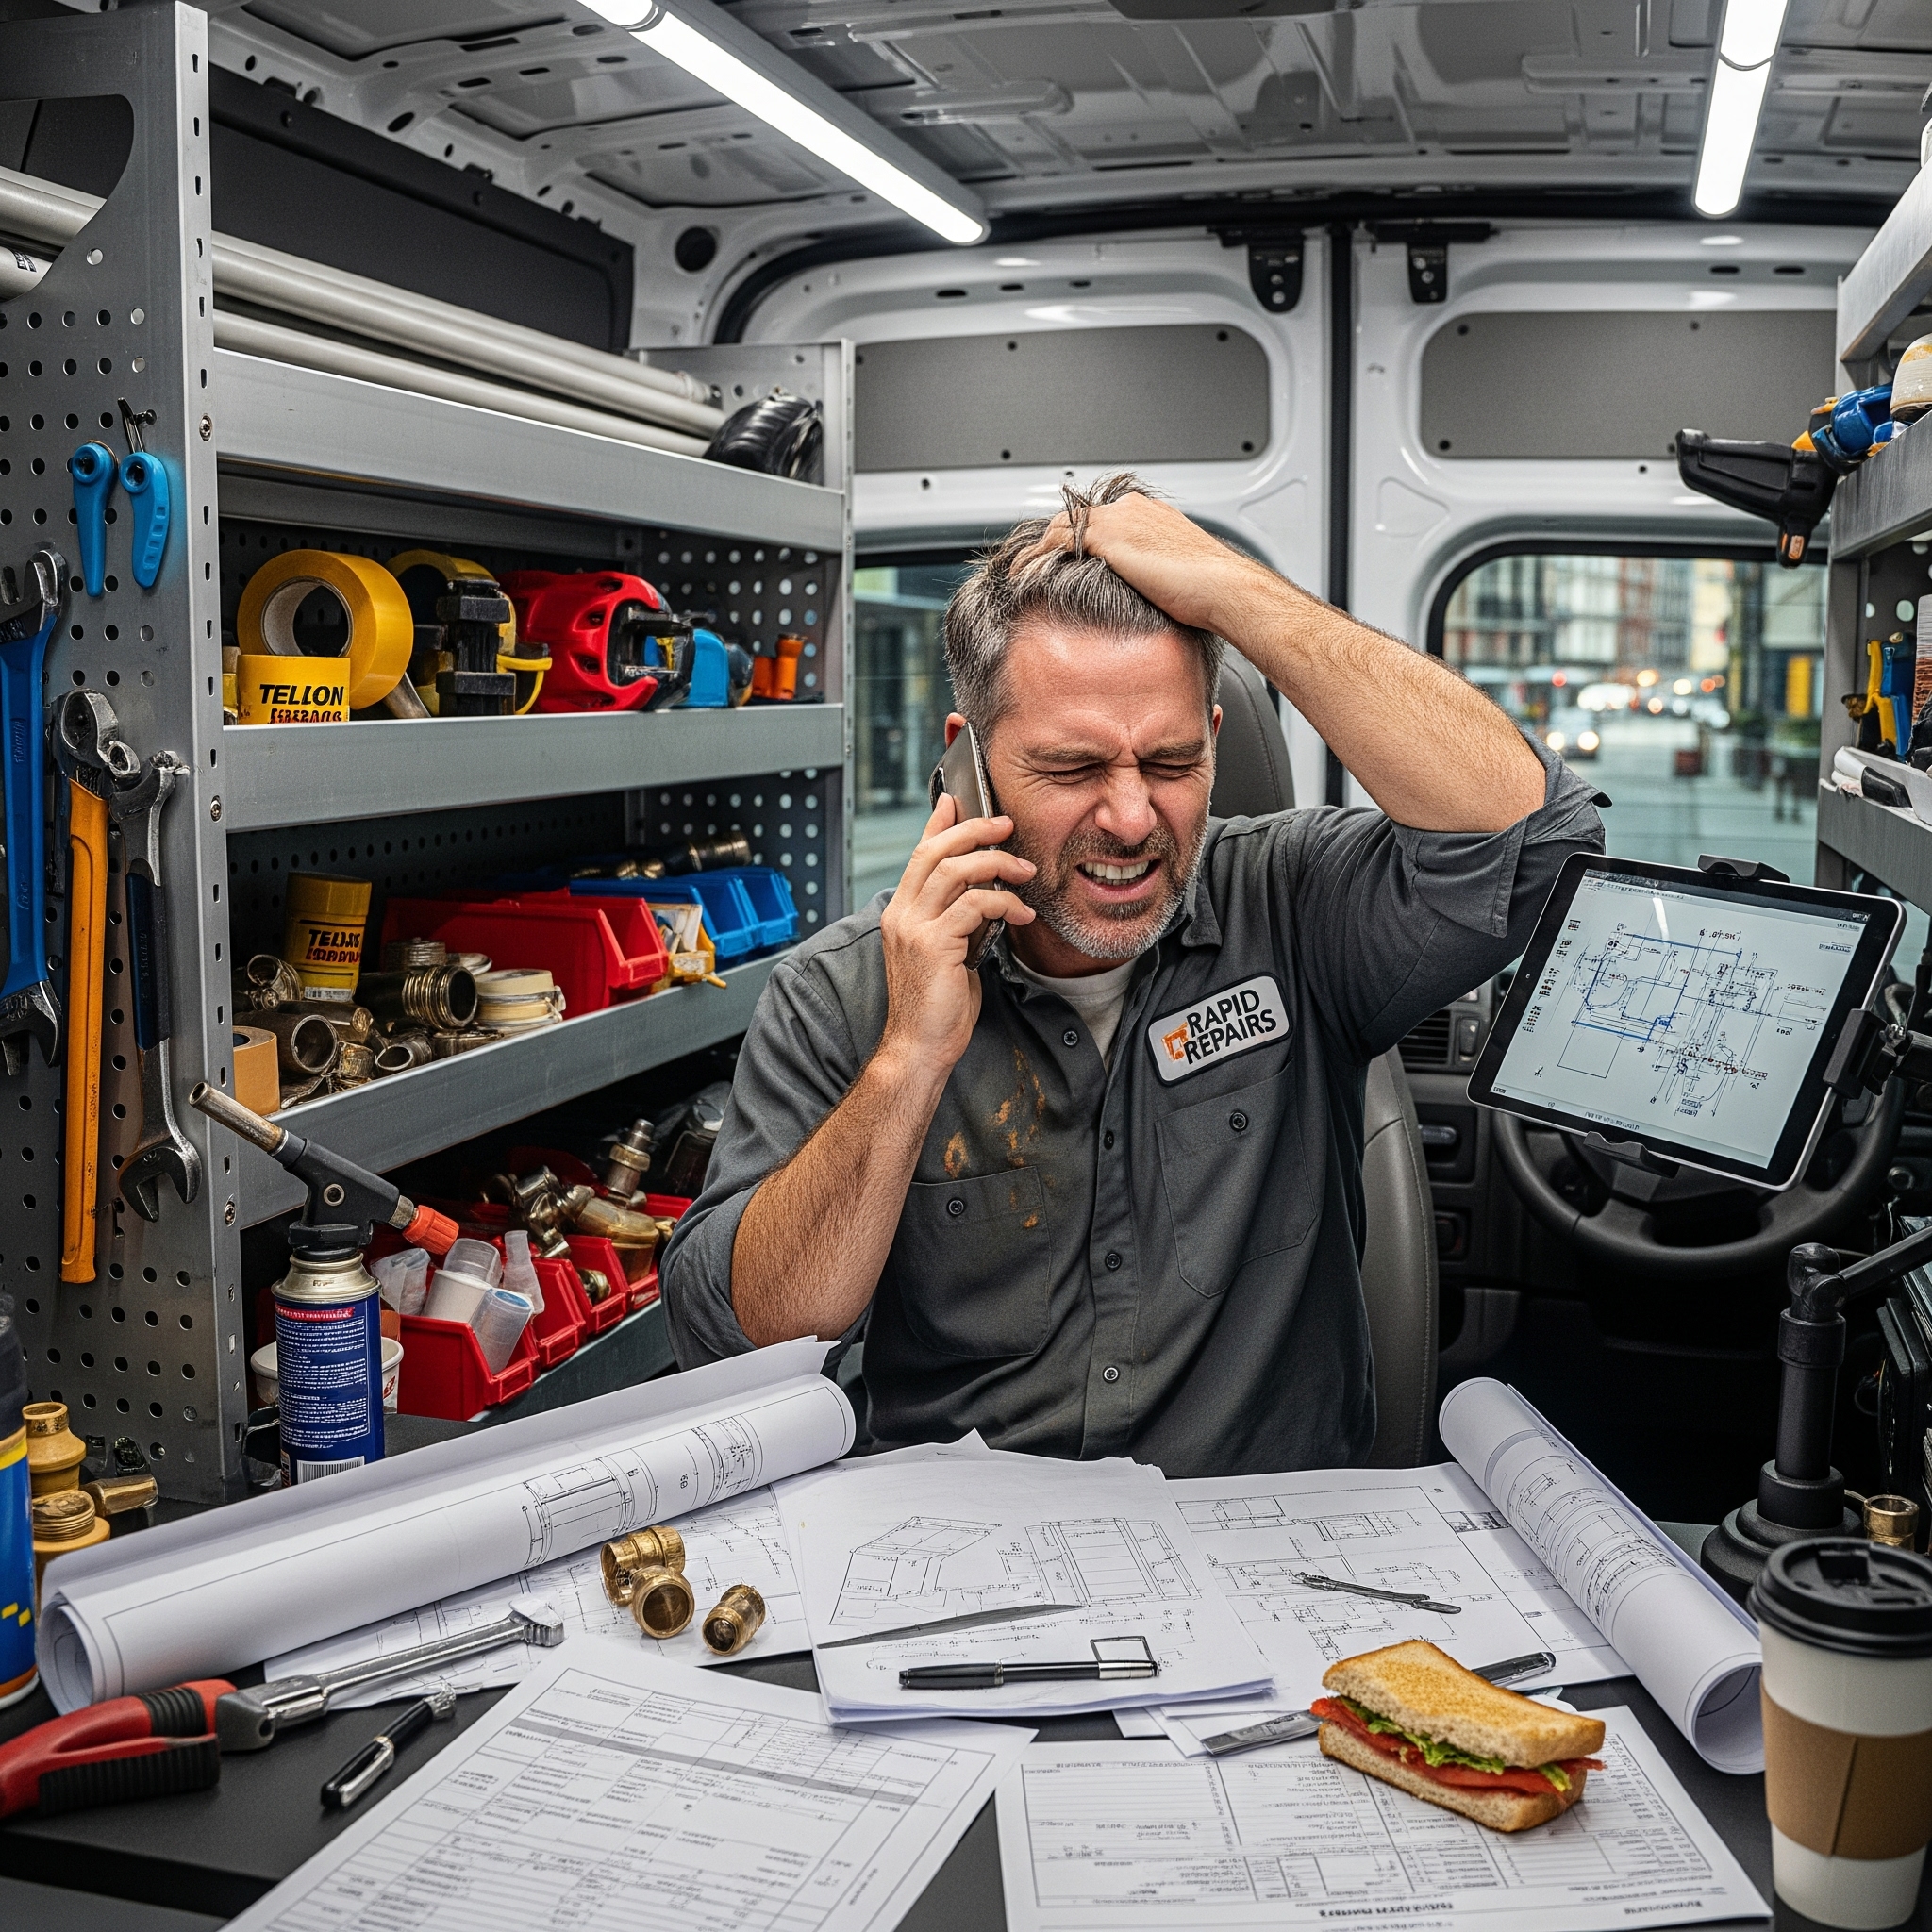
He recently invested in a "Lead Bot," a tool promising to act as his 24/7 AI Receptionist. The promise is incredible, but the setup email on his phone is filled with intimidating jargon: "integrate," "configure," "workflow automation." He's a plumber, not a programmer. The last thing he has is the time or energy to fight with complex software.
This guide is for Frank, and it's for you. This isn't a dense technical manual. It's a strategic, step-by-step roadmap written for skilled plumbing business owners who want to reclaim their time and stop leaving money on the table. We will cut through the tech-speak and guide you from initial login to the incredible moment you see your first job booked automatically—all in **under an hour**. Let's transform the chaos in your van into a calm, automated, revenue-generating machine. 🤖🔧
Your Pre-Launch Checklist: Gather Your Assets
Before we dive into the setup, let's spend 15 minutes gathering our tools. Just like organizing your truck before a big job, this preparation will make the entire process faster and far more effective. Having this information ready will turn a multi-hour chore into a simple, streamlined process.
- Your Core Business Info: Your official business name, address, and primary phone number. Consistency is key for local SEO.
- Your Company Logo: A high-quality digital file (PNG is best). This is crucial for branding your automated communications and looking professional.
- Defined Business Hours: Your standard hours of operation and, importantly, your policy on emergency/after-hours calls. The bot needs to know when to book a job versus when to promise an immediate callback.
- A Prioritized List of Services: Don't just list everything. Group your services (e.g., "Drain Cleaning," "Water Heater Installation," "Emergency Leak Repair"). This will help the bot qualify customers for your most profitable jobs first.
- Your Top 5 FAQs: What questions do you answer over and over? ("Do you offer financing?" "What's your service call fee?" "Are you licensed and insured?"). We can teach the bot to answer these, saving you even more time.
Got everything? Perfect. Let's build your new best employee.
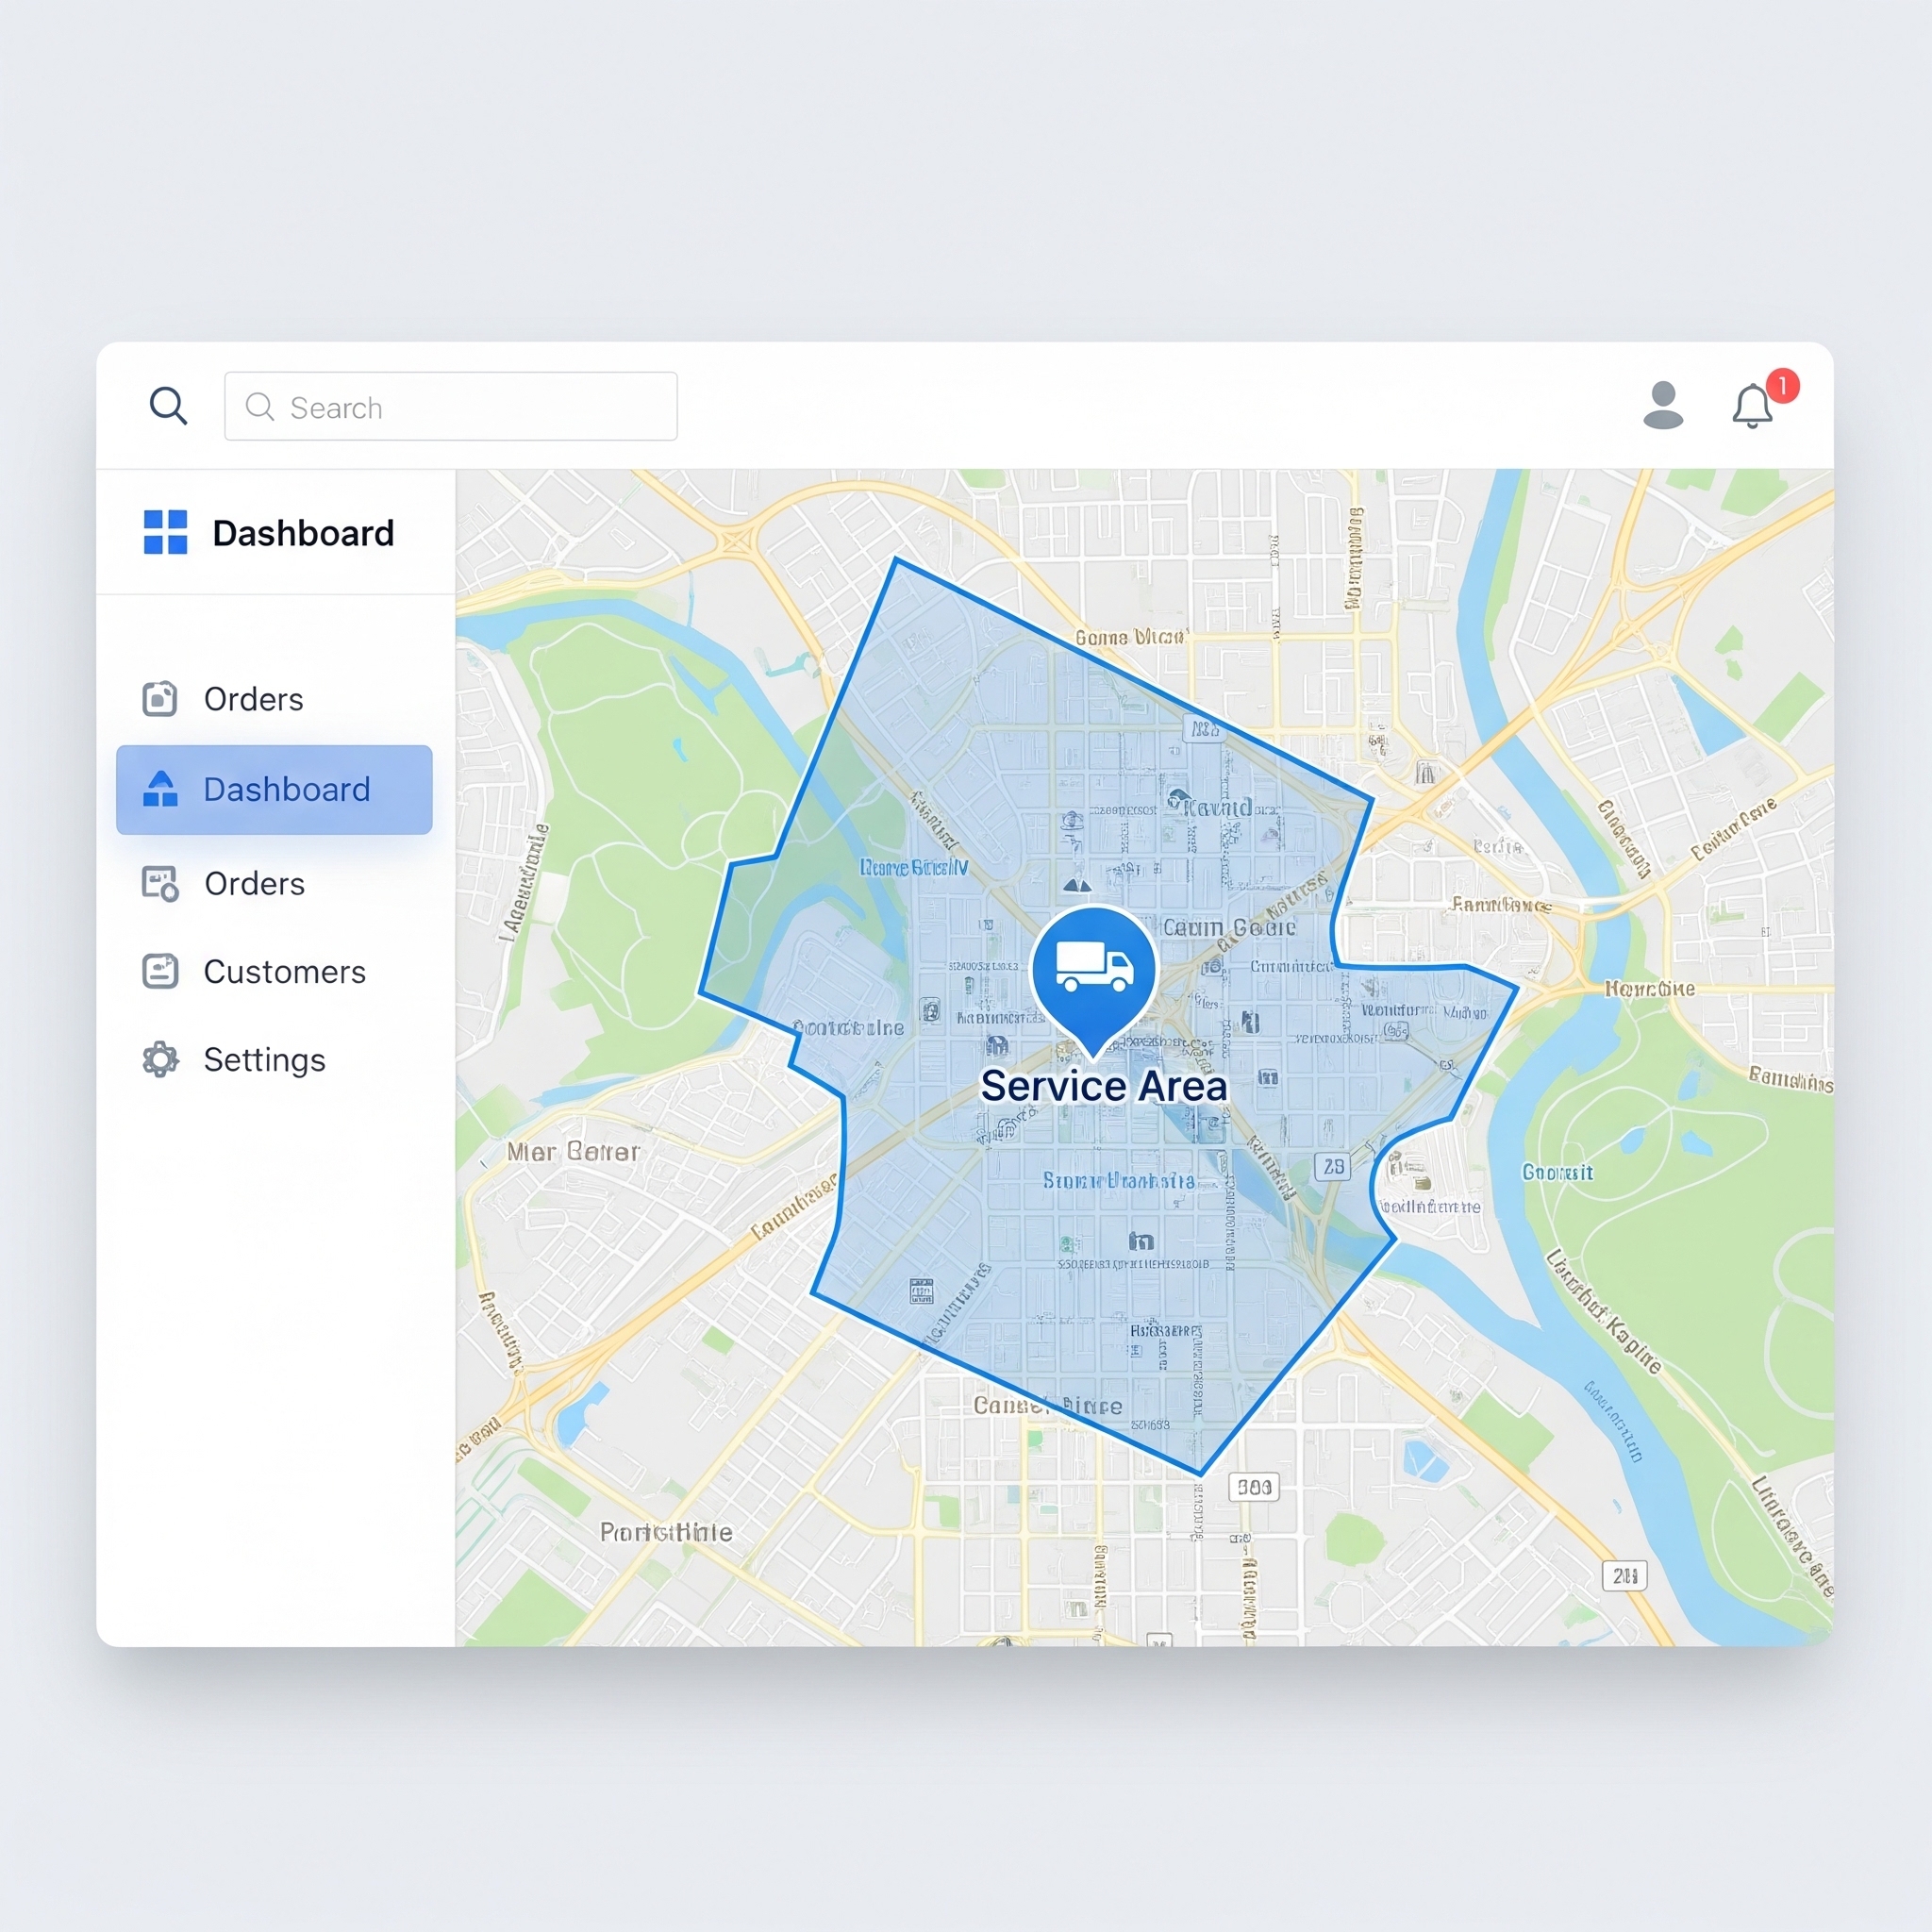
Step 1: Job Profitability Mapping (Service Area & Profile)
The Goal: To program your Lead Bot with your precise operational footprint—who you are, when you work, and exactly *where* you work. This is the foundation for getting pre-qualified, high-profit leads.
Why This Matters
How many hours have you wasted driving across town for a low-margin job? This step is more than just filtering out calls from 50 miles away; it's about **defining your economic battlefield**. By setting a precise service area, you ensure every lead the bot captures is within a profitable travel radius. This is the first and most critical step in transforming your business from reactive to strategic. It's the difference between randomly digging for pipes and working from a detailed blueprint.
How to Do It (10-Minute Walkthrough)
- Navigate to Business Profile: Log in to your Lead Bot dashboard. Look for a gear icon ⚙️ or a menu item labeled "Settings" or "Business Profile."
- Input Core Information: Fill out your company name, address, and phone number meticulously. This data will auto-populate in texts, emails, and invoices. Upload your logo to brand every customer touchpoint.
- Set Intelligent Business Hours: Find the "Operating Hours" section. Set your standard M-F hours. Crucially, define your "Emergency" or "After-Hours" policy. This tells the bot how to respond at 2 AM on a Saturday—whether to attempt to book the caller or to capture their info for an urgent first-light callback.
- Draw Your Profit Zones: Find the "Service Area" section. You'll see an interactive map. Don't just enter a radius. Use the polygon tool to draw a precise shape around your ideal neighborhoods. Exclude areas with heavy traffic or low-value jobs.
Don't just create one service area. Create several. A "Primary Zone" (Green) for your most profitable, easy-to-reach areas. A "Secondary Zone" (Yellow) for places you'll go but need to charge a travel fee for. You can configure your bot to automatically quote this fee during the booking process: "I see you're in our extended service zone. Just so you know, there's a $25 travel charge for that area. Is that okay?" This qualifies customers instantly.
Step 2: Deploy Your 24/7 AI Receptionist
The Goal: To create an unbreakable safety net that catches every single lead that comes via a phone call, even when you're on another line, under a sink, or asleep.
Why This Matters
A missed call isn't just a missed call—it's a direct, voluntary transfer of revenue to your nearest competitor. Industry data shows over **80% of callers with an urgent need will not leave a voicemail**; they simply hang up and dial the next plumber on their Google search. This step closes that revenue leak for good. By setting up conditional call forwarding, you're not replacing yourself. You're hiring a perfect, always-on assistant who only steps in when you're unavailable, ensuring 100% lead capture.
How to Do It (15-Minute Setup)
- Locate Your Lead Bot Number: In your dashboard, find the section called "My Number," "Call Forwarding," or "AI Receptionist." The system will have assigned you a unique business phone number. This is your bot's direct line.
- Access Your Phone Provider Settings: In a new browser tab, log in to your business phone provider (e.g., Verizon, RingCentral, Google Voice). If you use your personal cell, these settings are typically found under "Phone" -> "Settings" -> "Call Forwarding."
- Activate Conditional Call Forwarding: This is the most important part. You are looking for a setting named **"Conditional Call Forwarding"** or "No Answer/Busy Transfer." This is NOT standard call forwarding. It gives you full control, allowing you to set rules.
- Set the Rules: Configure your provider to forward calls to your Lead Bot number ONLY under these conditions:
- When your line is **busy**.
- When you **don't answer** after a set number of rings (e.g., 4 rings or 20 seconds).
- Save and Test: Paste your Lead Bot number into the designated field, save the settings, and immediately call your business line from another phone. Let it ring to confirm it forwards correctly.
Step 3: Build Your Customer Experience Engine
The Goal: To review and fine-tune the automated SMS templates to build trust, reduce no-shows, and generate 5-star reviews effortlessly.
Why This Matters
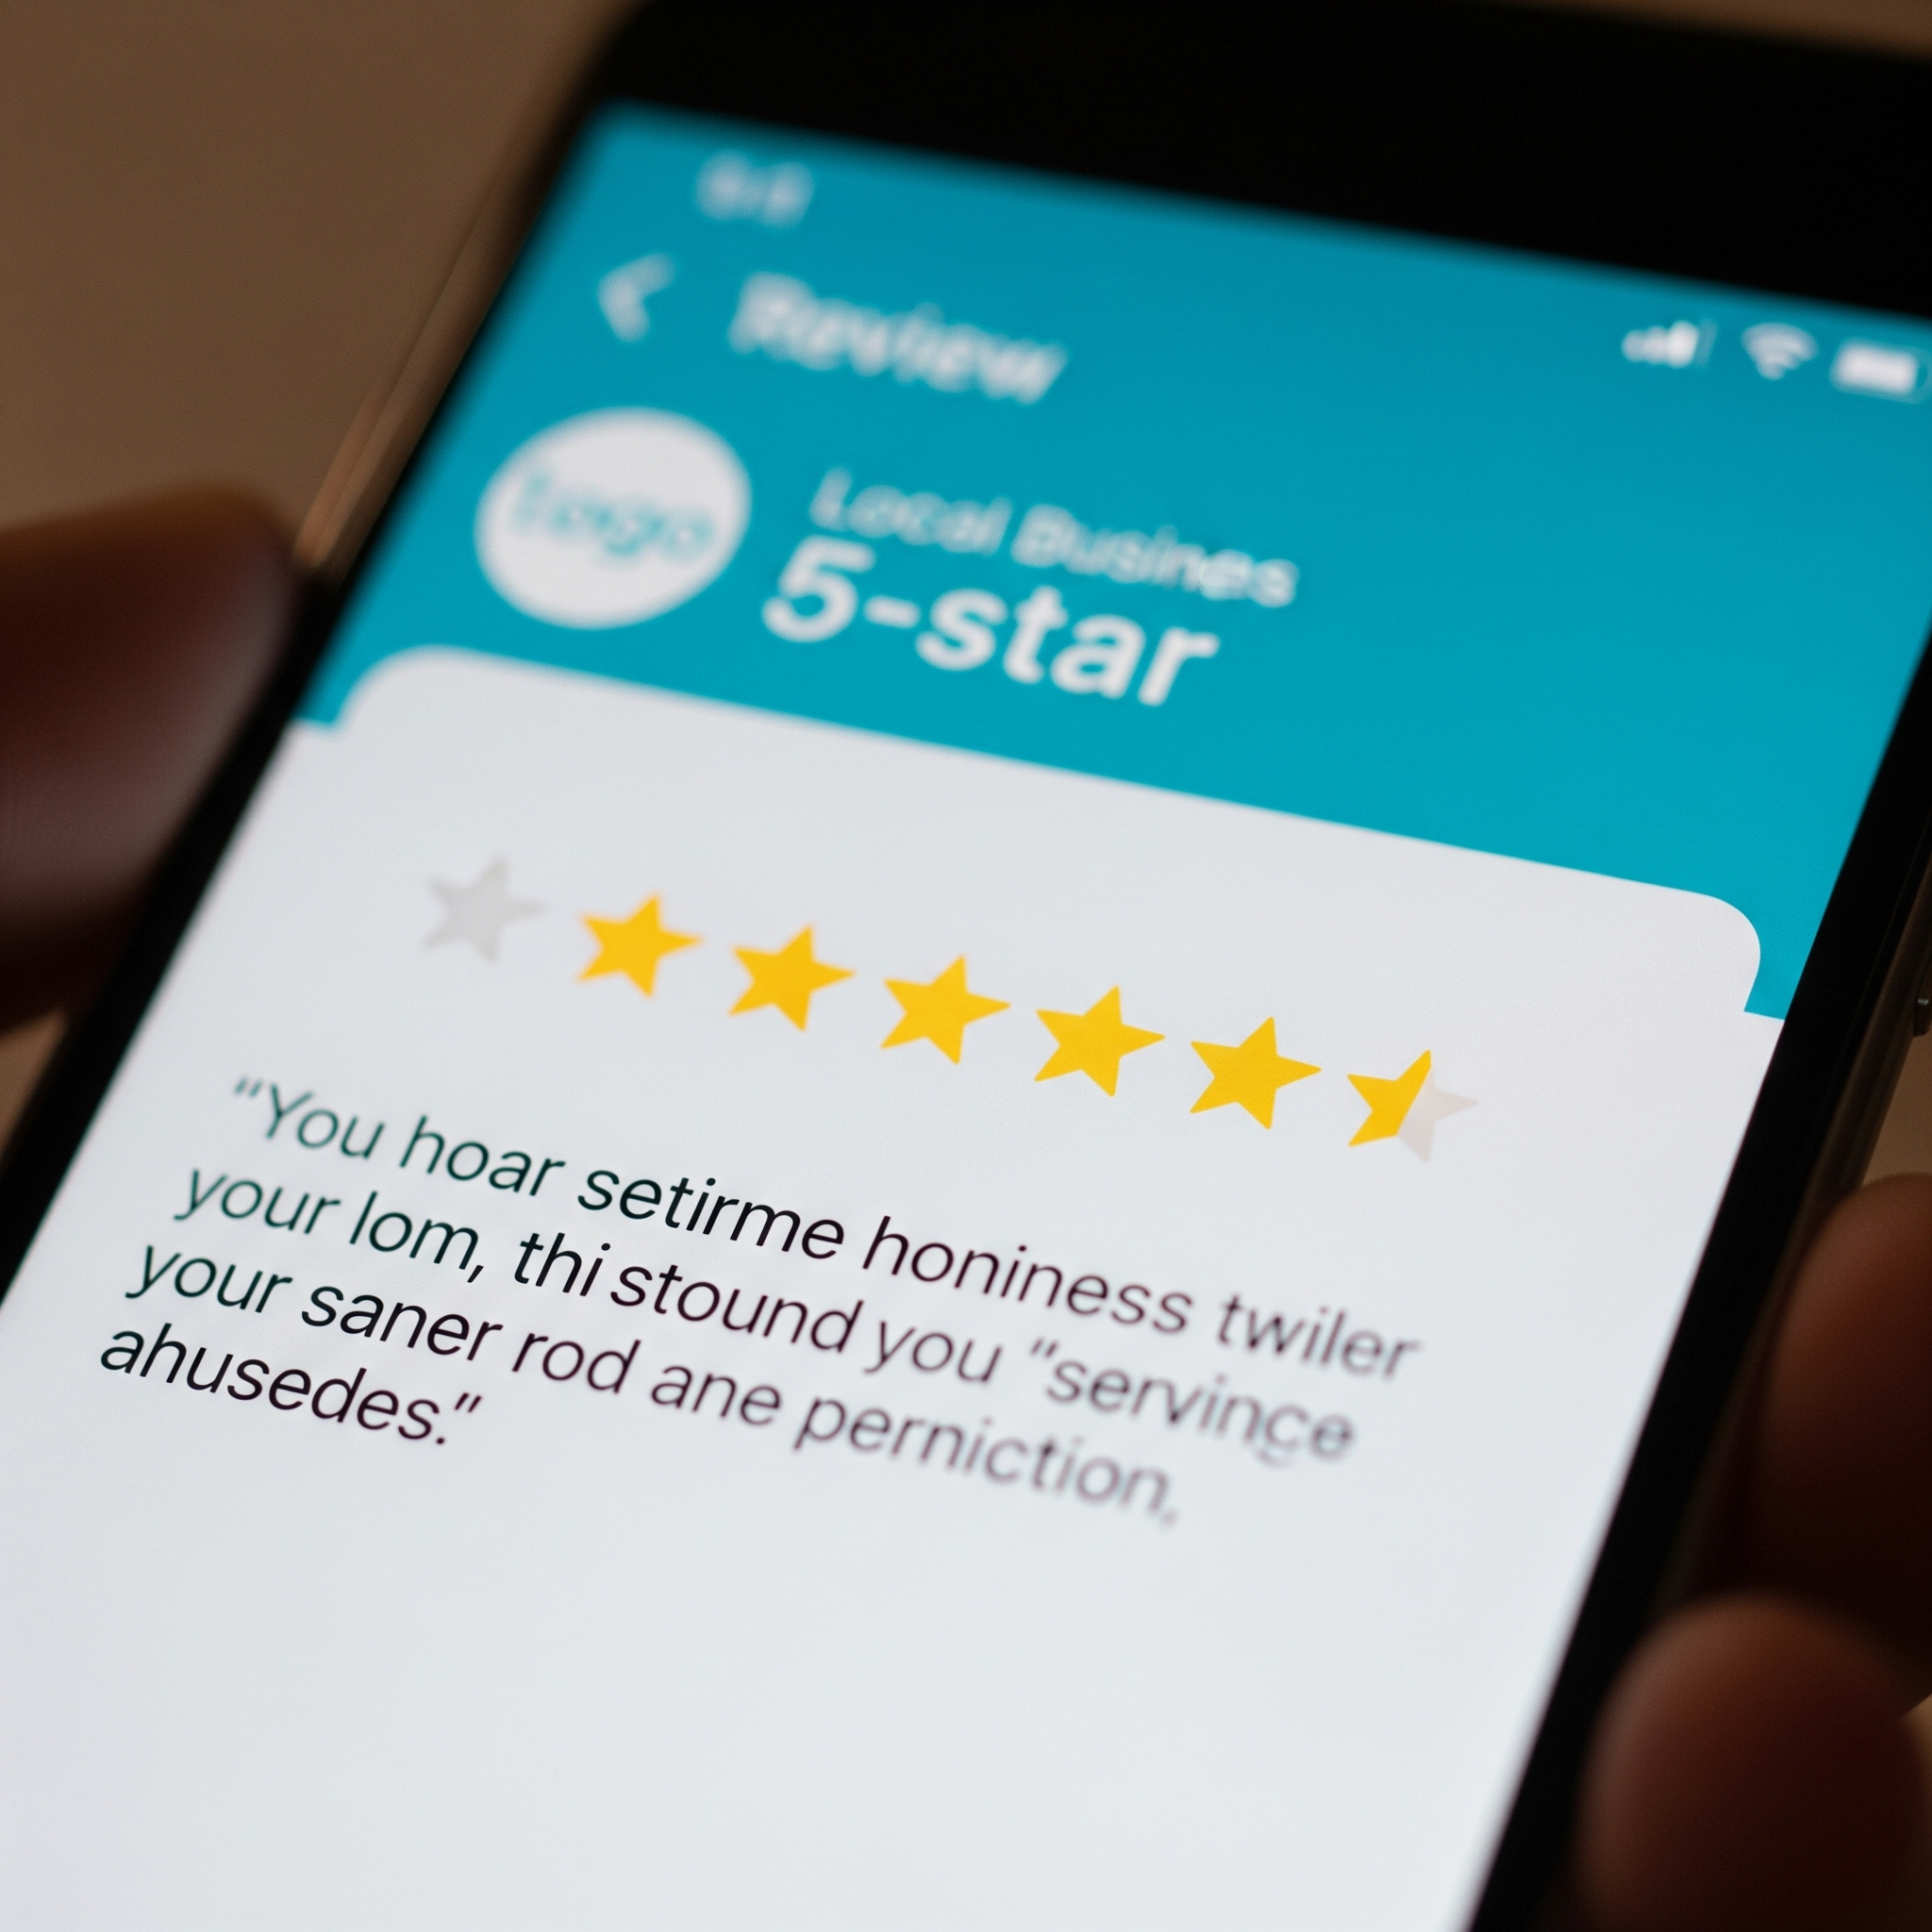
Automation should enhance your reputation, not make you sound like a robot. A professional confirmation text builds immediate trust after a booking. A timely reminder text can reduce costly no-shows by over 40%. An automated "Your technician is on the way!" text provides a "wow" customer experience. And a friendly follow-up text asking for a review is the single most effective way to build your online reputation. This step transforms your bot from a booking tool into a powerful, automated customer service platform.
How to Do It (10-Minute Review)
- Find "Automations" or "Workflows": In your dashboard, navigate to the section for automated communications.
- Review the Core Four Templates: Your system comes with proven, pre-built templates. Focus on these four first:
- Appointment Confirmation: Sent instantly after booking.
- Appointment Reminder: Sent 24 hours before the job.
- Technician On-The-Way: Sent when you or your tech mark it in the app.
- Review Request: Sent 1-2 hours after the job is marked complete.
- Inject Your Brand Voice: Read the templates. They're good, but make them yours. Change "Your technician" to "Your expert plumber, [Technician Name]." Add your company slogan or a friendly sign-off. Keep it concise, professional, and helpful.
Look for "Personalization Tokens" or "Custom Values." This lets you create rich, dynamic messages. A great reminder text isn't just generic; it's specific: "Hi [Customer Name], just a friendly reminder of your appointment with Frank tomorrow at [Appointment Time] to fix that leaky faucet. We look forward to seeing you!" This level of detail makes your automated system feel remarkably personal and professional.

Step 4: Transform Your Website into a Job-Booking Machine
The Goal: To convert passive website visitors into active, booked jobs by giving them a frictionless way to schedule service online, 24/7.
Why This Matters
Your website should be your best salesperson, not just a digital brochure. A modern customer, especially one with a non-emergency issue, often prefers the convenience of booking online to the hassle of a phone call. If your website's only call-to-action is a "Contact Us" form that languishes in your inbox, you are losing that entire segment of the market. Adding a "Book Now" widget opens a new, fully automated revenue stream and meets the expectations of today's consumer. For more on this, see our guide on the importance of a modern CRM for lead management.
How to Do It (5-Minute Copy & Paste)
- Find the "Website Widget" Section: In your Lead Bot dashboard, look for a menu item like "Website Widget," "Booking Form," or "Web Chat."
- Customize the Appearance: Choose a button color that matches your website's branding for a seamless, professional look.
- Copy the Code Snippet: You'll see a small box of code. Don't let it scare you. Simply click the "Copy to Clipboard" button.
- Paste the Code into Your Website's Footer: Log in to your website editor (WordPress, Squarespace, Wix, etc.). Navigate to the section that allows you to edit the site's footer or add "custom HTML." Paste the code snippet there and save. Placing it in the footer ensures it appears on every single page of your site.
In addition to the widget in the footer, go to your website's menu editor and add a new menu item called "Book Online Now." Instead of linking to a page, link it directly to your new booking widget's URL. This prominent placement makes it impossible for visitors to miss.
Step 5: The Final Quality Check & Go-Live
The Goal: To build 100% confidence in your new automated system by running two simple tests that simulate real customer interactions.
Why This Matters
Trust, but verify. Before this system becomes the frontline of your business, you need to see it work perfectly with your own eyes. A successful test provides the peace of mind that your setup is correct and ready to handle real, paying customers. This is the final inspection before you flip the switch.
How to Do It (5-Minute Test)
- Test 1: The Missed Call Funnel: Using your personal phone, call your business number. Let it ring until the call forwards to the bot. A moment later, you should receive an automatic text message from your bot. Respond to it with a common plumbing issue like "my toilet is clogged" and follow the prompts to book a test appointment.
- Test 2: The Website Funnel: Go to your website. Click the new "Book Now" button. Go through the online scheduling process as if you were a new customer.
- Verify in the Dashboard: After both tests, open your Lead Bot dashboard. You should see two new leads with the complete conversation or booking history. Your calendar should show two new test appointments. If it all looks good, delete the test appointments.
Congratulations! You've successfully built, tested, and deployed a powerful automation system. You are officially live. 🎉
Conclusion: You're Not Just a Plumber Anymore—You're an Operator
Less than an hour ago, you might have felt like Frank, overwhelmed by the things you couldn't control. Your time, your evenings, and your potential for growth were all held hostage by the ringing of a phone.
Now, you've engineered a system. You've built an automated, 24/7 employee that is relentlessly efficient, perfectly professional, and completely focused on growing your business. Your voicemail is no longer a liability; it's a lead capture machine. Your website is no longer a passive brochure; it's an active booking agent. You have moved from a position of chaos to one of control.
What's Next? Advanced Bot Tactics
This setup is just the beginning. Your Lead Bot is a platform for growth. Now you can explore:
- Automated Quote Follow-ups: Automatically text customers a few days after you send a quote to see if they have any questions.
- Seasonal Service Reminders: Create a campaign that automatically texts customers in the fall to schedule pipe winterization or in the spring for AC tune-ups.
- Integration: Connect your bot to software like QuickBooks to automatically create invoices when a job is marked complete.
You are no longer just the master technician. You are the operator of a sophisticated, scalable business. The time you've reclaimed can be invested back into your company—hiring another tech, launching a marketing campaign, or simply going home at a reasonable hour to have dinner with your family.
You've built the engine. Now build the racetrack.
Our advanced guide on Sales Pipeline Stages for Plumbers will show you how to manage the flood of new, qualified leads you're about to receive.